Who is this article for?
This article will be useful to you if you are using PartnerStack to accept leads submitted by your partners, and want to change the default pipeline of stages on a Lead.
Lead forms are a great tool that allow your partners to submit potential leads for your business, and monitor their progress through your sales pipeline. This pipeline of stages (i.e. New, Qualified, Closed Won, etc.) can be customized and expanded to communicate essential information about the lead to your partners.
What are lead pipelines?
Lead pipelines are the ordered list of stages a lead goes to through its lifetime, often starting with “New” and ending with “Closed Won.” Leads are often sold to by your direct sales team, not the partner, so displaying a lead’s stage accurately may be important for your partner.
For an overview of how to create a lead form, see the Using Lead submission support guide.
Lead forms and pipelines are only available on certain plans. If you are unsure if you have access to lead pipelines or would like to discuss enabling them, please reach out to your Customer Success Manager or email support@partnerstack.com.
Accessing lead pipelines
Lead pipelines can be applied to one or many groups at once. This allows you to make changes to several groups’ pipelines at once. You may access your lead pipelines either through your group or through the settings page.
To access the lead pipeline your group is assigned to:
- Log in to your PartnerStack account
- Select “Groups” in the menu on the left
- Navigate to the group with the pipeline you wish to customize, and click on it to open it up
- Select “Lead submission” from the tabs along the top
- If you do not see the Lead submission tab, the leads feature has not been enabled for your account. Please reach out to your CSM for more information
- If you haven’t already created a new lead registration form, refer to our help document on Creating lead forms
- Scroll down to the bottom of the page, where you can view information about your Lead stages.
- Select “View pipeline >” to the right of the Pipeline field

To access the list of all lead pipelines:
- Log in to your PartnerStack account
- Select “Settings” in the menu on the left
- Select “Features” from the tabs along the top
- Select “Lead settings” from the list of features
- Select the name of the pipeline you wish to customize

Customizing lead pipelines
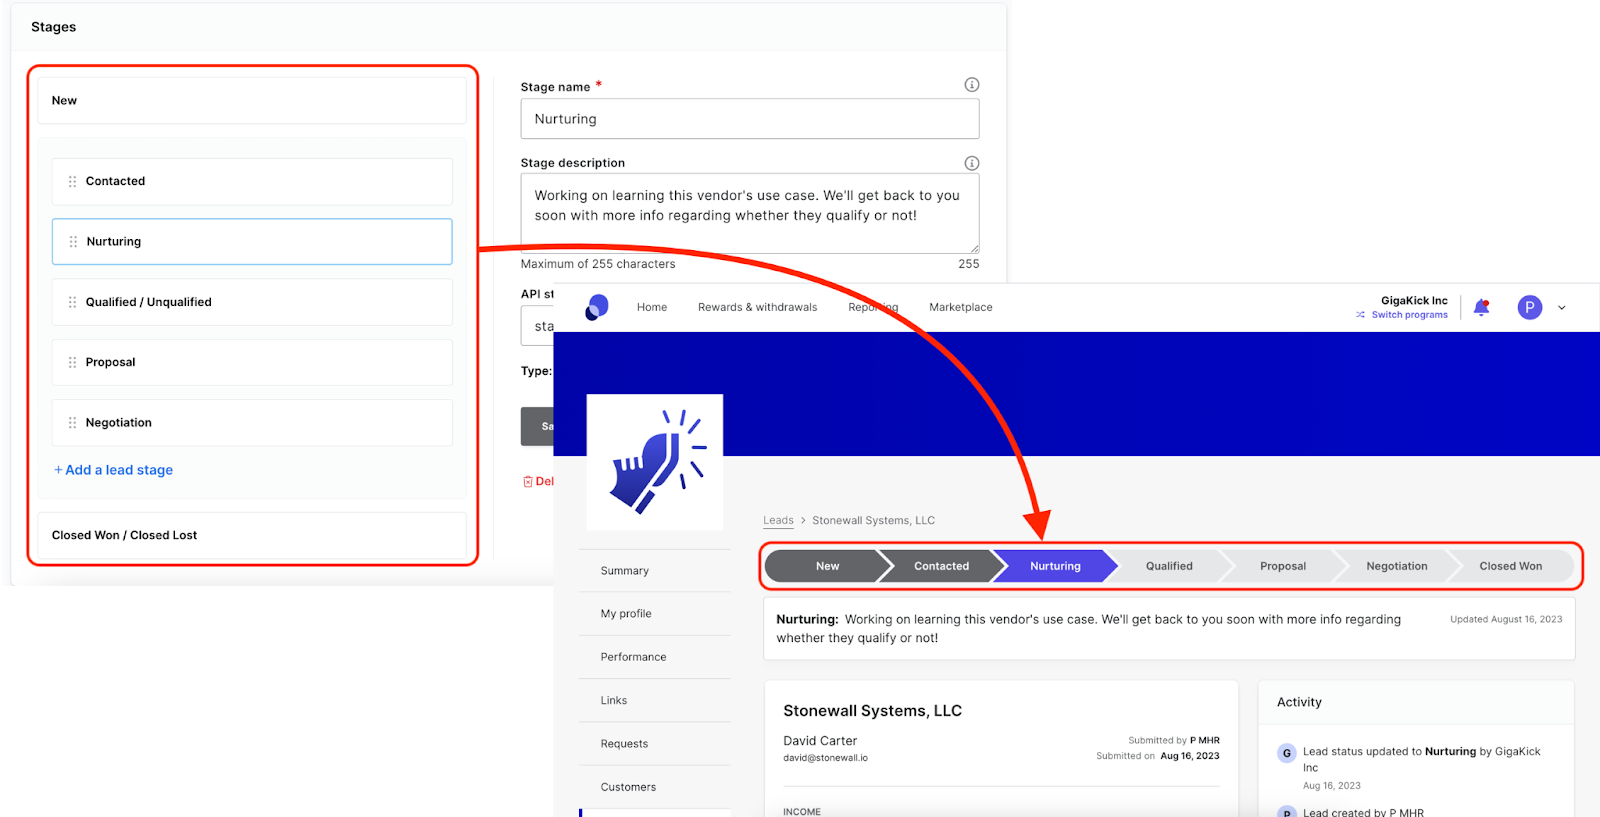
Once you have the details of your pipeline open, you can customize the pipeline to communicate Lead information appropriately to your partners.
Some stages in a lead pipeline are pre-defined, and may be referenced by your triggers or email campaigns. These are named New, Qualified, Unqualified, Closed Won, and Closed Lost by default. You can change the names and descriptions of these stages by clicking on the desired stage, modifying their details, and clicking “Save”. However, you cannot remove them from your pipeline. You can also change the API name of these stages, which is how they are referred to in your Workato integration to your CRM.
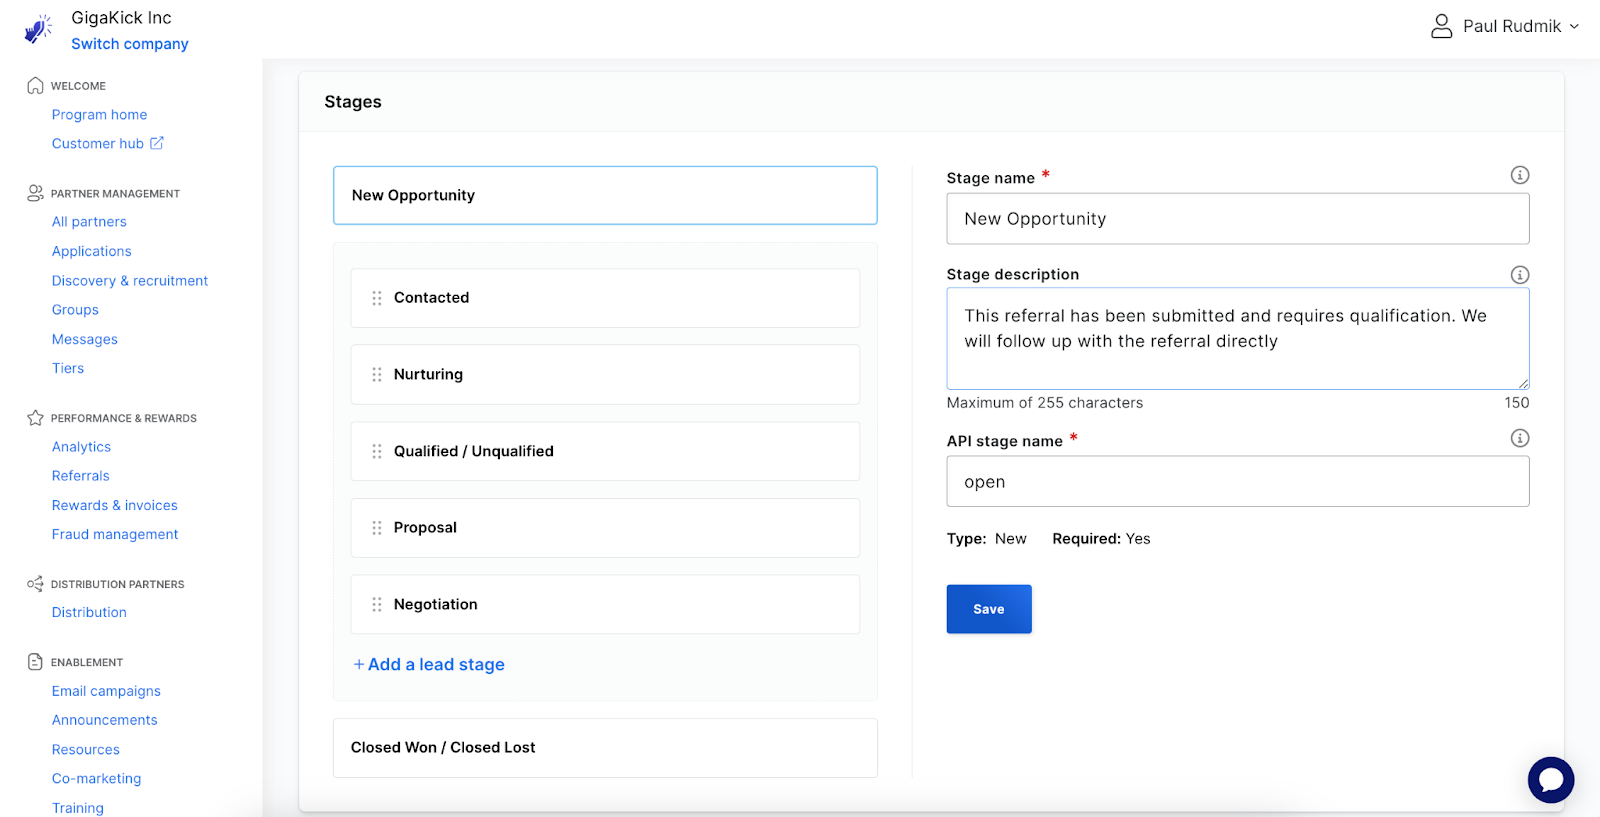
You can add up to ten custom stages to any lead pipeline by clicking the “Add a lead stage” button. You can also change the name, description, and API name of these custom stages.

The order of stages in your lead pipeline represents the order given to your partners and teammates when looking at a Lead. With the exception of New being first and Closed Won / Closed Lost being last, you can reorder your pipeline’s lead stages by clicking on stages by their handle, and dragging them into the order you desire.

Finally, you can remove any custom stages from your pipeline by clicking into the stage and selecting “Delete stage”. If any Leads are currently set to that stage, you will be prompted to reassign them to a different stage within the same pipeline.

Creating lead pipelines
You can create a new lead pipeline to contain a distinct set of stages. This is helpful to distinguish the information partners in one group might see from another. You may either create a new lead pipeline with default stages or duplicate an existing pipeline’s contents.
To create a lead pipeline:
- Access the list of lead pipelines
- Select “Create pipeline”
- Enter the Pipeline name. This must be distinct from other pipelines.
- Select “Create pipeline” on the top-right corner of the Lead pipelines table.
This will create a new lead pipeline containing the five default pre-defined stages: New, Qualified, Unqualified, Closed Won, and Closed Lost.

To duplicate an existing pipeline’s contents:
- Access the list of lead pipelines
- Select the “...” action menu to the right of the pipeline you want to duplicate
- Select “Clone”
- Enter the Pipeline name. This must be distinct from other pipelines.
- Select “Create pipeline”

This will create a new lead pipeline containing the same stages and ordering of the original pipeline.
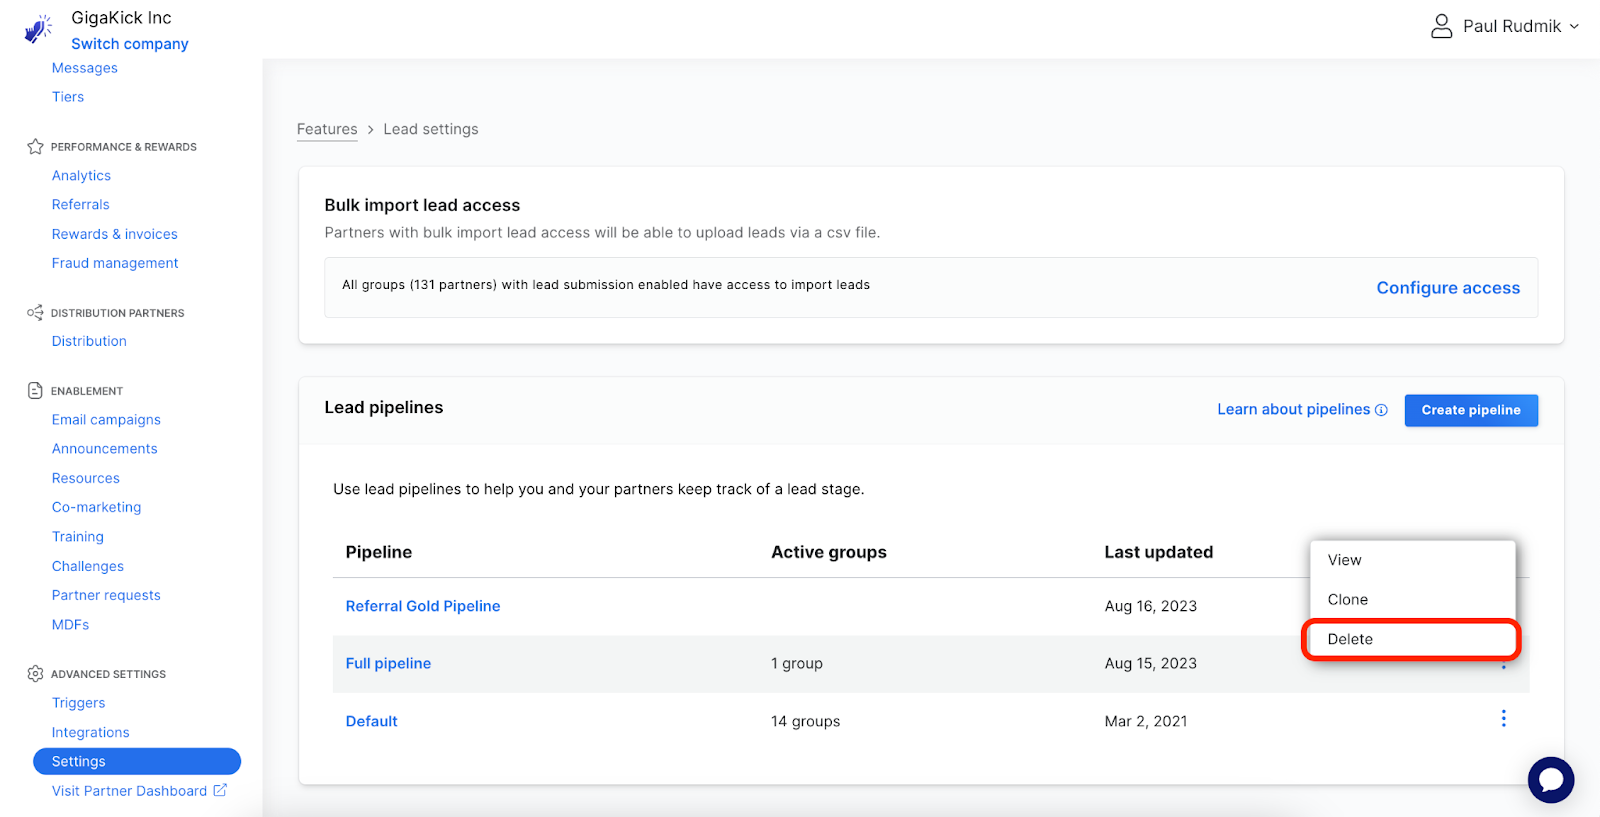
Deleting lead pipelines
Redundant lead pipelines can be deleted to simplify the options presented when creating or modifying a group’s lead submission form.
Lead pipelines that are assigned to any groups cannot be deleted.
To delete a lead pipeline:
- Access the list of lead pipelines
- Select the “...” action menu to the right of the pipeline you want to duplicate
- Select “Delete”
- Note: this option will be disabled if the pipeline is currently assigned to any groups
- Select “Delete pipeline”
Assigning a group’s leads to a lead pipeline
Lead pipelines may be used by many groups’ lead submission forms at once, allowing for a central source-of-truth for lead pipelines between multiple groups. Once a group changes from one pipeline to another, all of its Leads will be migrated to use that new pipeline.
To assign your group’s leads to a specific lead pipeline:
- Select “Groups” in the menu on the left
- Navigate to the group with the lead pipeline you wish to change, and click on it to open it up
- Select “Lead submission” from the tabs along the top
- If you do not see the Lead submission tab, the leads feature has not been enabled for your account. Please reach out to your CSM for more information
- If you haven’t already created a new lead registration form, refer to our help document on Creating lead forms
- Scroll down to the bottom of the page, where you can view information about your Lead stages.
- Click into Pipeline dropdown and select a new pipeline to use.
- If there are any leads in the group that are assigned to a custom stage, select which stage they should be mapped to in the new pipeline.
- Click Save

Migrating leads from one pipeline to another: In the event that there are many Leads that need to be changed from one stage to another, the change from one pipeline to another may take some time to reflect for you and your partners.
Integrating lead pipelines & custom stages with your CRM
Any lead stage from any lead pipeline can be synced back and forth with your CRM’s stages. To integrate your customized lead pipeline with your CRM, please contact support@partnerstack.com.